Contents
Instalation
To run the GUI you need to download the srs_ui_pro package. You can download them from the git repository:
git clone git@github.com:mrodriguez-robotnik/srs_ui_pro.git
After that you will need the SkypeKit downloaded and working in your machine. In this link you can find info about the installation process.
You will need to register and create a project. After that, you should download the “SkypeKit for Desktop” 3.x for Linux. When the download is finished, you will be able to request a file called keypair.pem.
At this point, you should have completed these requirements:
- SDK downloaded.
The file skypekit_path/bin/linux-x86/linux-x86-skypekit-novideo exists. Where skypekit_path is the path where you have decompressed the SkypeKit.
- You have a keypair.
If everything is OK, please follow the next steps:
Add a new variable called SKYPE_KIT_PATH to the .bashrc:
echo "export SKYPE_KIT_PATH=skypekit_path" >> ~/.bashrc
. ~/.bashrc
Copy the requested keypair.pem into the path srs_ui_pro/skype_utils.
Copy the skypekit_path/bin/linux-x86/linux-x86-skypekit-novideo file into the path srs_ui_pro/skype_utils, rename it as skype-runtime and give it execution permissions.
Replace the keyFileName value in the skypekit_path/examples/cpp/tutorial/keypair/keypair.h file for the new path (srs_ui_pro/skype_utils).
Open and compile (with codeblocks) the file skypekit_path/interfaces/skype/cpp_embedded/build/codeblocks/skypekit-cppwrapper_2.workspace
- Compile the srs_ui_pro packages.
Appearance
The srs_ui_pro is composed by three windows:
- Loggin screen
- Main window: The window that appears when you run the program. Here are all the panels and menus.
- rviz window: The window where you could see the simulated environment.
Loggin screen
To start the program it's necessary to log into an Skype account.
Main window
1. Tools menu:
- This menu shows different options:
- Skype
- Start: Starts the Skype funcionalities. Reinitialize: Reinitialize the Skype funcionalities.
- Run: Run rviz Visualization list: Launch the desired visualization marker. Manipulation list: Launch the desired interactive marker.
- Run: Run the cob_dashboard.
- Skype
2. Request panel events:
In this grid you can see the current requests events. Currently there are only a fake request. To accept it you must to do double click over it. Until a request is not accepted, there will be many options disabled.
3. Skype panel:
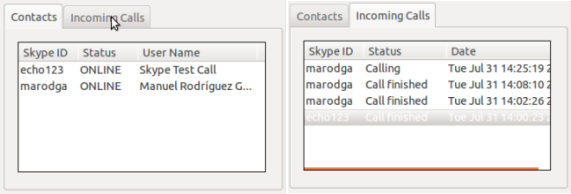
Into the Contacts tab you can see all the Skype contacts. You can click on them to init a chat/call or to see the contact info. Into Incoming calls tab you can find the current voice user calls.
4. Actions panel:
In this panel you can find three important tabs: Automatic, Semi and Manual.
Each one allows to command automatic/semi-automatic/manual actions to the robot.
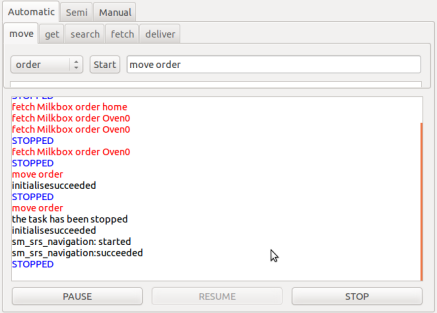
In the Automatic tab you can find some srs_decision_making actions: move, get, search, fetch, deliver, stop, pause and resume. Each sub-menu allows you to select the desired params for the action. When you has selected the desired parameters, the Start button sends the order. Feedback can be seen in the log box.
Finally, the STOP/RESUME/PAUSE buttons allows to send the stop/resume/pause actions to the decision making.
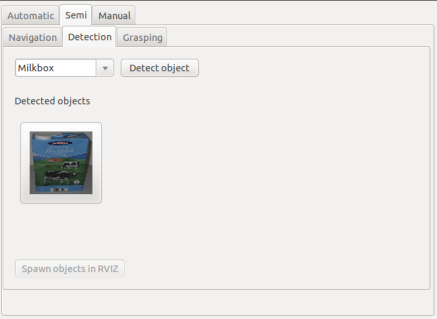
Into the Semi tab you can find the sub-menus: Navigation (currently unused), Detect and Grasping. The Detect tab allows you to detect a desired object:
If rviz has been runned from the Tools menu, the Spawn objects in RVIZ button will be enabled and you will can to spawn detected objects into rviz. You can click over the object to see extra info about its relative position. Finally, if objects has been detected, Grasping tab will be activated.
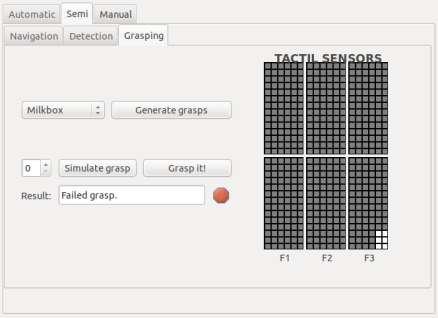
The Grasping tab allows to grasp a desired object without use the decision making. The robot tries to grasp the object without move the base or other component (except the arm and the hand).
When you click over Generate grasps button, the get_feasible_grasps service is called. When it finish (and if it works), you can select the desired grasp ID and simulate/grasp it. The TACTILE SENSORS image shows the current state of the hand sensors.
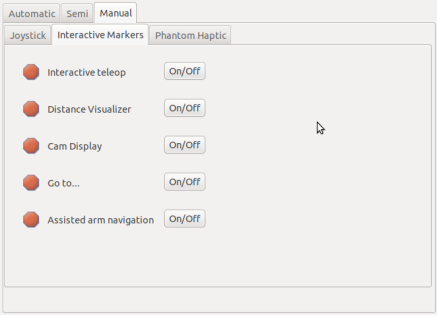
Finally, the Manual tab has three sub-menus: Joystick, Interactive Markers and Phantom Haptic. Currently, only the second sub-menu is working. From there, you can launch different options to the rviz window. All the interactive markers that you can launch from this menu are also launchable from the Tools->rviz menu.
5. Status panel:
In this panel you can find general info about the current connection. Moreover, there are a status log that warns you about what is working or failing (ROS and SKYPE info).
6. Options panel:
Here you can find three sub-menus: ROS, Objects and Tasks.
The first one shows the lisf ot the current nodes, topics, services and params. The second one, shows info about all the database objects. Moreover will allow to add a new object to the database. Finally, the Tasks menu will allow to save predefined actions as “get milk”, or “get milk and move to the charger station”.
7. Objects on tray panel:
This panel is just to show how many objects (and what objects) are in the tray.
rviz window
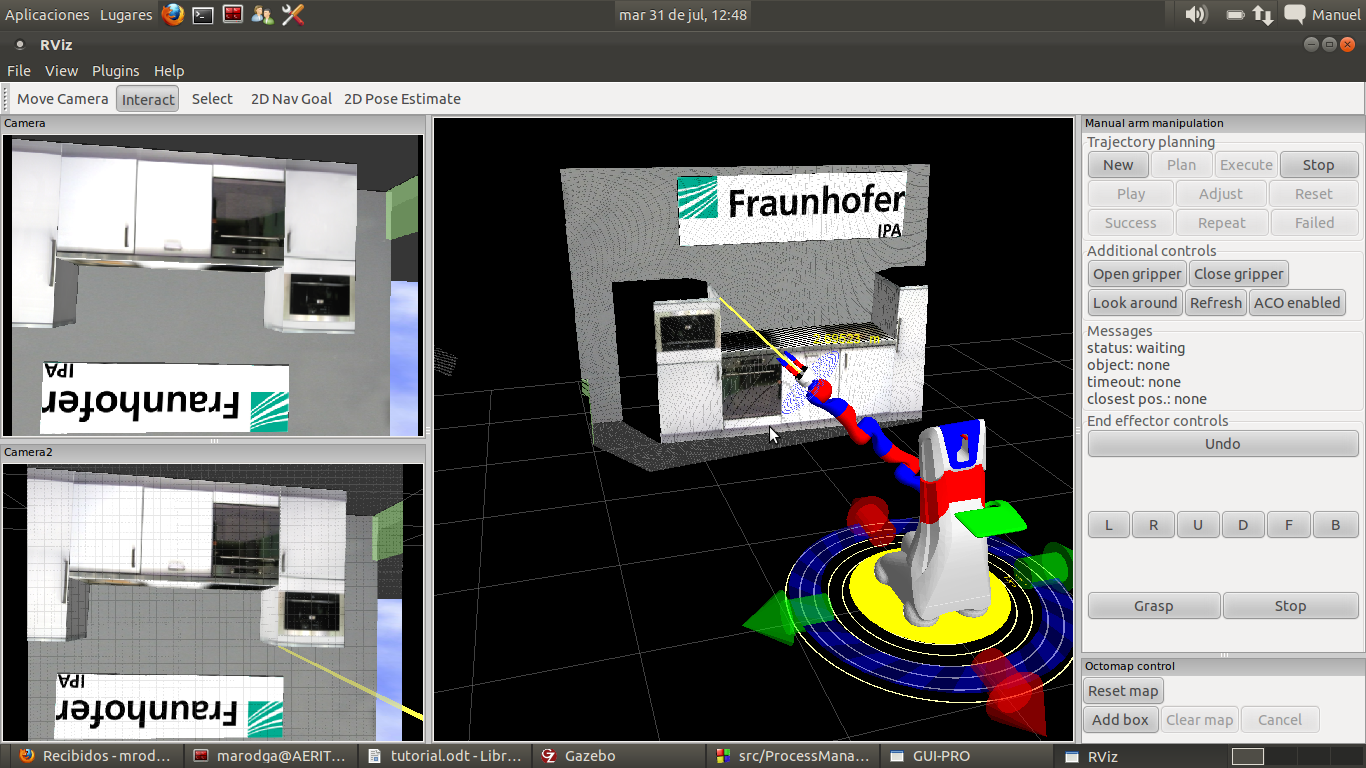
his window shows the simulated robot and environment. Moreover, you can interact with some markers as the teleop, the assisted arm navigation, etc. This window is editable, but first time load the configuration from the srs_ui_pro/rviz_confing/config file. Some of its features (the interactive markers) should be launched from the main window (Tools->rviz-> or Manual tab->Interactive Markers tab). It should looks like this:
Usage/Examples
General info
To run the srs_ui_pro interface you should run:
roscd srs_ui_pro
rosrun srs_ui_pro srs_ui_pro
After that, the Main Window should appears. If all is well configured (see Instalation section) the Status log box should display: [INFO] You can now initialize Skype. Go to Tools->skype->Start to run Skype features. The next blue message should be displayed into the Status log: [SKYPE]: Connected!. If a red message appears, something is wrong configured.
As we still don't have defined a request protocol, we are using a fake request. So, to start the connection you must double clicking over the only one request in the grid: (id=4815162342). By defauly, it tries to connect to localhost, so a message like this should be displayed: [INFO] Connected to localhost:11311. A red message indicates that something is wrong.
If all is ok at this point, you should be able to start to use the interface. You can chat/call with the Skype contacts, see the Incoming Calls events table (to accept external calls), command orders to the robot, run the simulator, see the current list of topics/nodes/services/params, etc.
Some info is automatically updated (state of tactile sensors, decision_making log, status log, etc) but another info as the list of services/params or the objects on tray needs to be updated manually. To do it, click over the image:
Errors and other info should be displayed on the status log. If the connection is missed, the panels will be disabled and you will need to start again the connection.
Skype features
If the Status log box shows the message [INFO] You can now initialize Skype. Go to Tools->Skype->Start, a message like this should be displayed: [SKYPE]: Connected!.
Into the Contacts tab you can see all the connected contacts. This list is automatically updated every 5.0 seconds. If you click over a contact two options appears: User info and Open conversation.
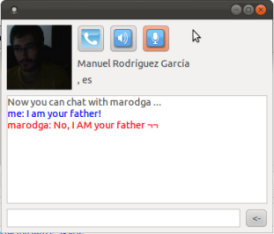
The first one allows to read information about the contact. This info should be obtained from a database users so in this moment is void. The other one allows to start a chat/voice (or both) conversacion with the user:
At this window you can chat with the contact, talk with him, mute her voice and mute your microphone. On the other hand, if another contact writes you and his window is closed, the messages will appears in the current conversations until you open his user window. If all the user windows are closed, the messages will appears on the Status log box.
On the other hand, into the Incoming Calls tab, you can find info about the people that is trying to call you. If someone is calling you, you can accept his call double clicking over the event.
rviz tools
After to start rviz (Tools->Rviz->Run) you can run some tools to work over it. Some of this tools are runables from his own panel or from Tools->Rviz->Visualization/Manipulation.
The next list contains all the optional tools runables from the Tools menu:
Visualization:
Visualization->Distance: Display a distance line between the selected joint and a obstacle.
Visualization->Cam Display: Display a cam image over the point cloud.
Visualization->Spawn Objects: Add/remove movable objects (detected objects) or furniture objects (sofa, fridge, table, etc).
Manipulation:
Manipulation->Assisted arm navigation: Allows to teleoperate the arm/hand.
Manipulation->Move base: Allows to teleoperate the robot base.
Manipulation->Go to...: Allows to indicate a position for the robot base (and it goes there).
Limitations
At this moment there are some troubles that should be cleared:
- How will we get requests? What format will have this requests? How we will accept and connect to the external request? We don't have a defined request protocol, at this moment we are only working at local.
- Are video options needed? We have found a lot of problems to integrate video with the Skype API.
- We have not idea about how to learn and add new objects.


